How to install color profile on Lightroom mobile without Internet?
How To Install Lightroom Mobile Presets Without Desktop
This tutorial will teach you to put in Lightroom Mobile presets into the app, without using the desktop version in the least . you'll even be ready to save them as presets and apply them with one click.
If you have already got the desktop version of Lightroom (to subscribe Lightroom Desktop click here), you'll simply sync your presets between Lightroom Desktop and Mobile.
But if you would like to download Lightroom mobile presets straight to your phone and use them on the free app without browsing the desktop version, you'll roll in the hay directly on your phone.
If you haven’t yet, inspect our custom Desktop and Mobile presets here.

Step 1: Download the DNG files to your phone
Most mobile presets you buy (including ours) will come as DNG files that you simply can download on to your phone. If that’s the case, skip on to Step 2.
But some presets could be compressed into a zipper file. Most cell phones aren't ready to open ZIP files. Here you've got two options:
Option A
You can use apps like iZip to unzip the file directly on your phone. Click to download the file then tap on Open in iZip:
Once you’ve unzipped the files on your phone, go to Step 2 to import them into Lightroom.

Option B
If you've got a computer handy, download the ZIP file on your laptop and double-click to unzip it. that ought to create a folder of an equivalent name with the DNG image files inside.
Now you would like to transfer the DNG files to your phone via Dropbox or the other method you favor .
Simply drag your DNG files into your Dropbox folder and await the files to sync. Once all of your files are synced, enter your Dropbox folder in your phone app and export each DNG file into your phone. See detailed steps below:
Open the Dropbox app on your phone and tap on the three dots button next to every DNG file:
How To Install Lightroom Mobile Presets Without Desktop
This tutorial will teach you to put in Lightroom Mobile presets into the app, without using the desktop version in the least . you'll even be ready to save them as presets and apply them with one click.
If you have already got the desktop version of Lightroom (to subscribe Lightroom Desktop click here), you'll simply sync your presets between Lightroom Desktop and Mobile.
But if you would like to download Lightroom mobile presets straight to your phone and use them on the free app without browsing the desktop version, you'll roll in the hay directly on your phone.
If you haven’t yet, inspect our custom Desktop and Mobile presets here.
Step 1: Download the DNG files to your phone
Most mobile presets you buy (including ours) will come as DNG files that you simply can download on to your phone. If that’s the case, skip on to Step 2.
But some presets could be compressed into a zipper file. Most cell phones aren't ready to open ZIP files. Here you've got two options:
Option A
You can use apps like iZip to unzip the file directly on your phone. Click to download the file then tap on Open in iZip:
Once you’ve unzipped the files on your phone, go to Step 2 to import them into Lightroom.
Option B
If you've got a computer handy, download the ZIP file on your laptop and double-click to unzip it. that ought to create a folder of an equivalent name with the DNG image files inside.
Now you would like to transfer the DNG files to your phone via Dropbox or the other method you favor .
Simply drag your DNG files into your Dropbox folder and await the files to sync. Once all of your files are synced, enter your Dropbox folder in your phone app and export each DNG file into your phone. See detailed steps below:
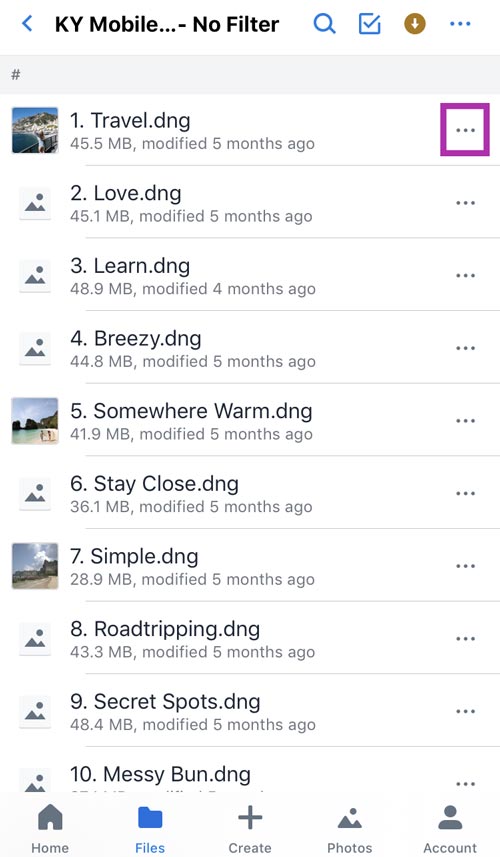
Open the Dropbox app on your phone and tap on the three dots button next to every DNG file:
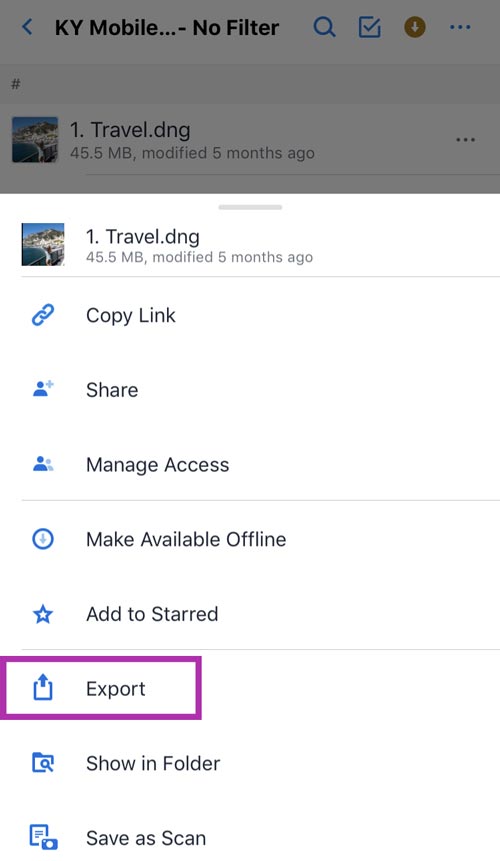
Then tap on Export:
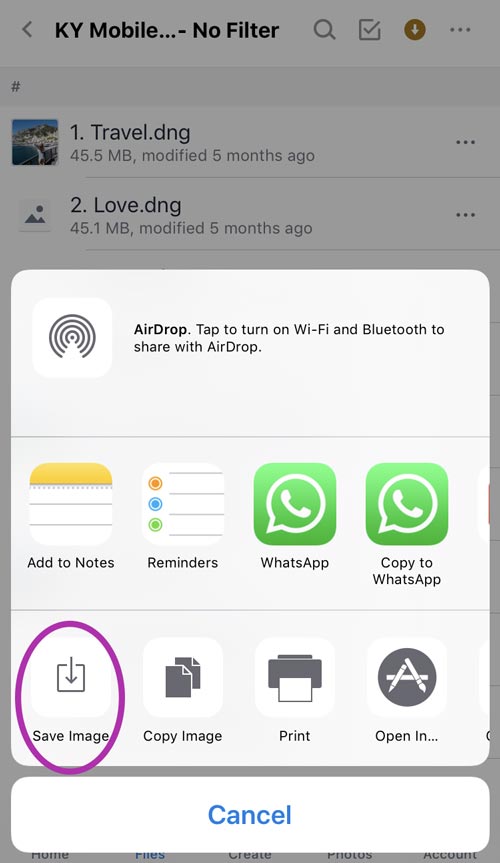
Then tap on Save Image:
Step 2: Import the preset files into the Lightroom app
At now you ought to have all of your DNG files saved to your phone. These function “preset carriers” and now you only got to add them to Lightroom mobile and save presets out of them.
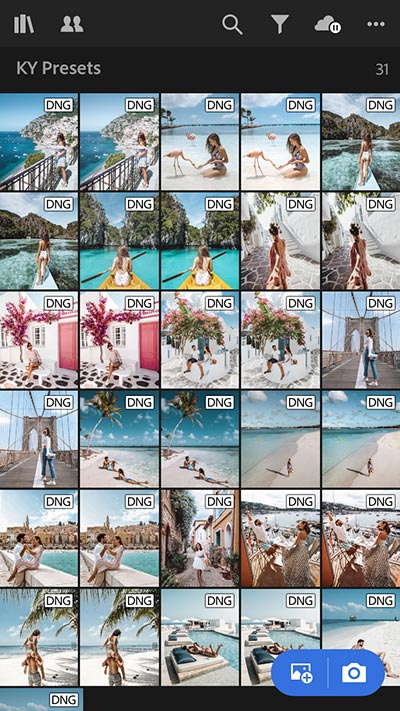
If you enter your photo stream and see them as blank picture files, don’t be alarmed – that’s how they ought to look.
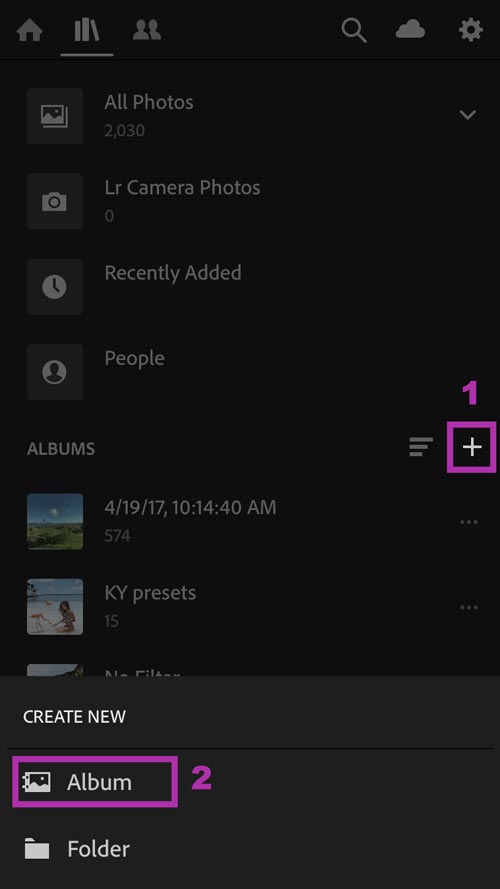
Open the Lightroom app and make a replacement album. during this case we’ll name it KY Presets:
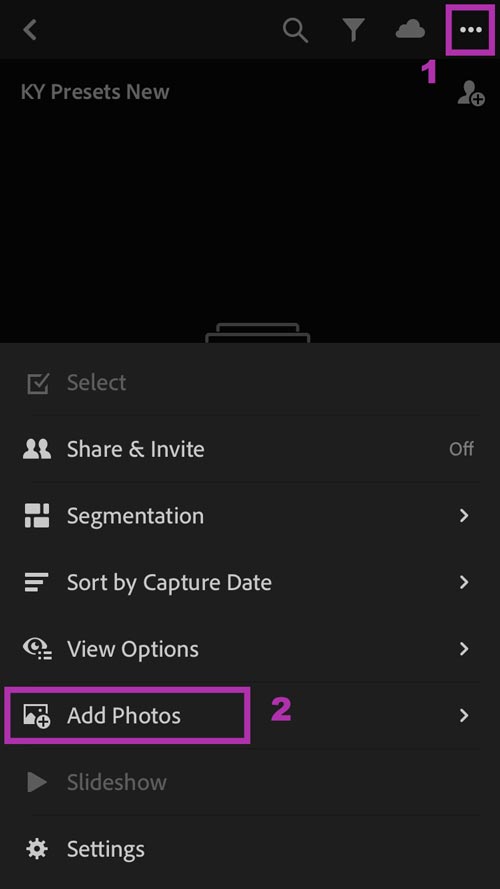
Then open the new album, tap on the 3 dots in the upper right corner and then tap on Add Photos:
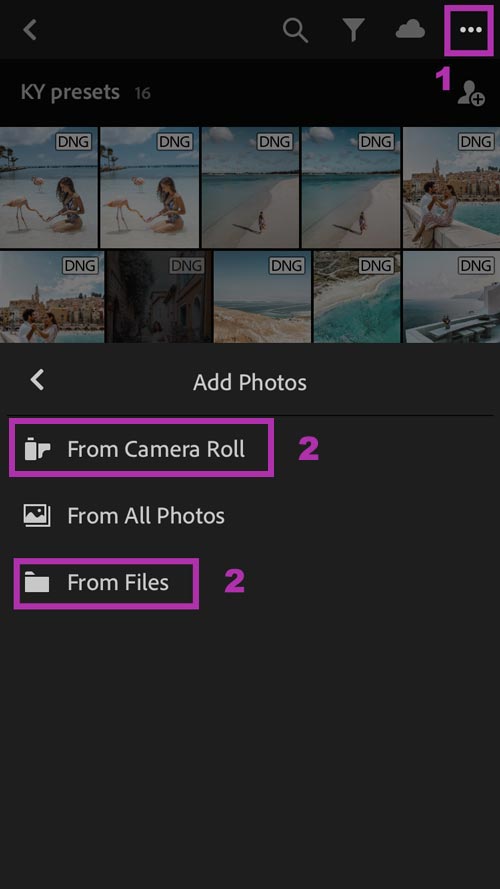
If you downloaded your DNG files through iZip to files, select From Files and then navigate to iZip files. If you downloaded them directly to your Camera Roll through Dropbox or download, select From Camera Roll:
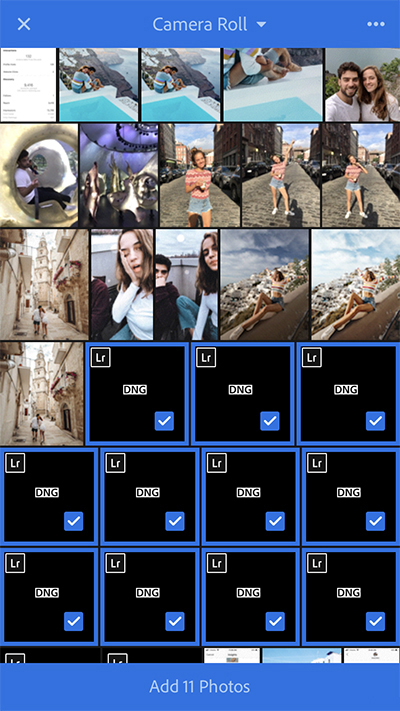
Next, select the DNG presets from your camera roll (or from iZIP) and import them into the newly created album in Lightroom:
Step 3: Create and save your Presets
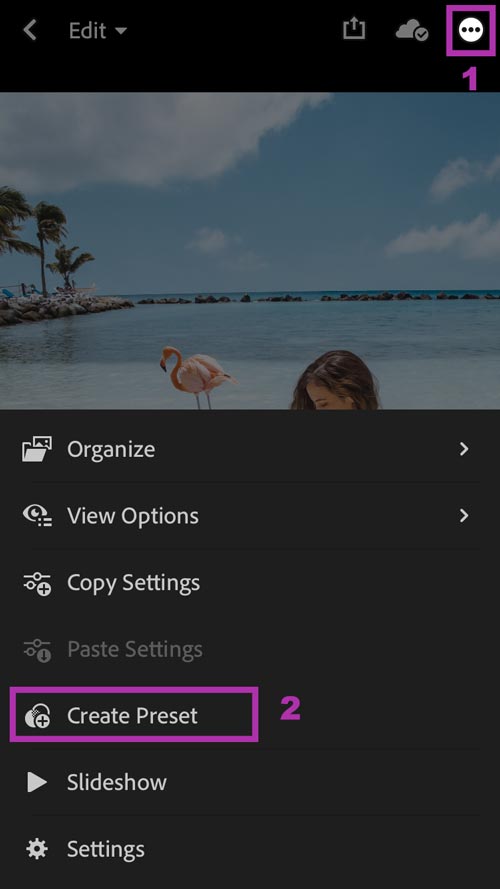
Go into the album containing your newly imported DNG files. Open the first file:
Now tap on the 3 dots icon at the top right of the screen and then tap on Create Preset:
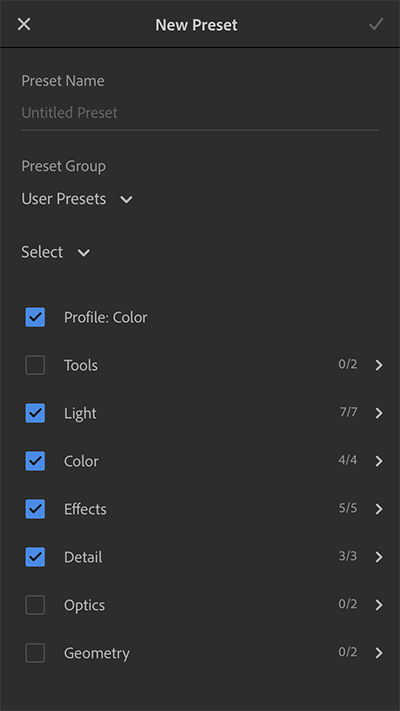
Next you'll see the New Preset screen (shown below) which contains all the choices you'll use to customize your preset. you'll give your preset a reputation (highly recommended) and add it into a Preset Group in Lightroom. you'll reserve it in User Presets otherwise you can create a replacement preset group and name it however you wish . We recommend this if you've got tons of presets and need to stay them organized.
The checkboxes below determine which picture settings you’d wish to save with this preset. Only the settings you select here are going to be applied to the photographs you edit with this preset within the future.
I personally check all boxes apart from Tools, Optics and Geometry. That’s because those parameters vary from picture to picture and that i will probably never got to crop or tilt an image precisely the same way because the preset for instance .
When you’re done with the settings save your preset by tapping on the checkmark icon at the top right corner.
Repeat this step for each DNG file as you will need to save each preset separately. Don’t worry though, you only need to do this once!
Step 4: Using Lightroom Mobile presets
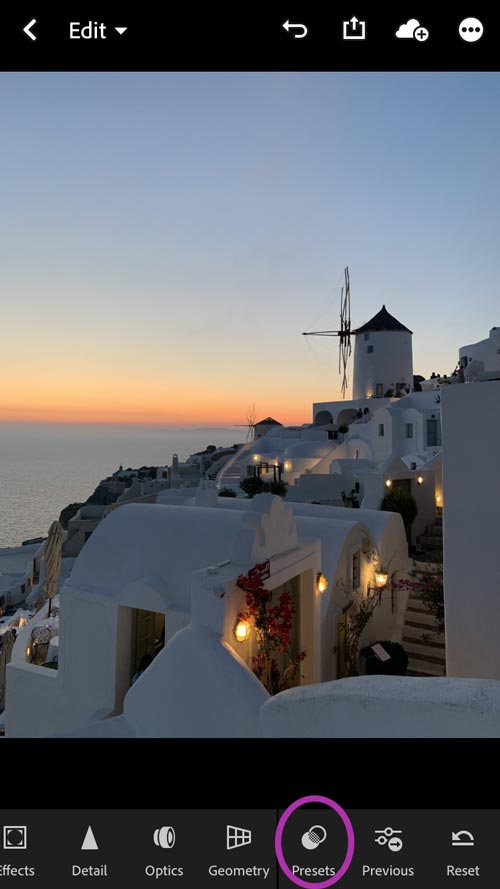
To use your new presets just return into your library and open any photo you’d wish to edit.
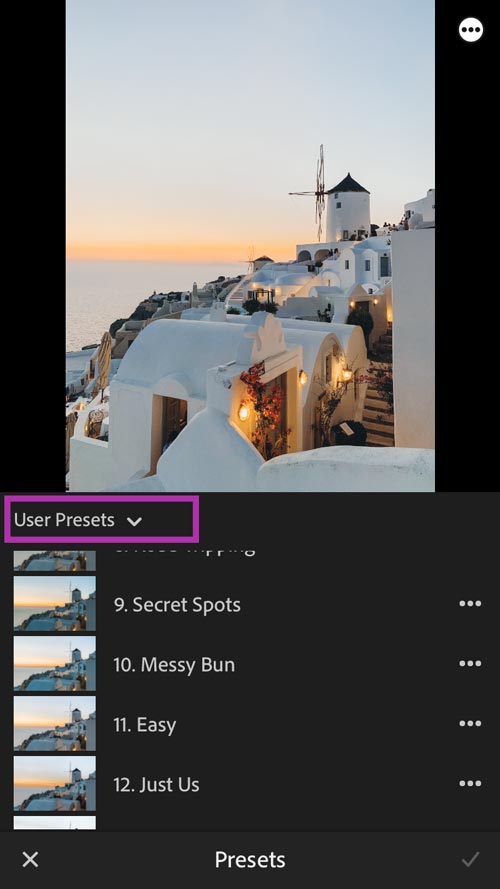
Find the Presets icon within the menu at rock bottom of the screen and tap thereon . confirm the Preset Group that’s selected is that the one where you saved your new presets. If you saved them within the User Presets group, select that.
apply-mobile-preset-lightroom
Now you'll edit the photo by tapping on a preset from the list then tapping on the checkmark. you'll still still edit the photo and make adjustments if you wish , after you’ve applied the preset.
install-mobile-presets-lightroom
And that’s it! Now you recognize the way to install, save and use your Lightroom Mobile presets without desktop! Let
Post a Comment